Objectives
-
Navigate and use Microsoft MakeCode
-
Create and code a timer using variables
-
Code a conditional statement to check how much time has passed
-
Code different inputs to reset a timer and change the pet’s mood
Materials
Key Questions
-
What was the hardest part about using MakeCode to program code onto your micro:bit?
-
What other features could you try and code into the functionality of this pet?
-
How is this virtual pet similar to a real pet? How is it different?
-
What else might you use conditional statements for when coding?
-
What else could you code a micro:bit to act like?
What To Do
If this is your first time using a micro:bit, we recommend you follow familiarize yourself with the First Steps as outlined on the micro:bit website here.
Note: If coding on computers or laptops, we highly recommend using Micro:bit classroom which allows you to lock student’s screens, send them code, and edit their code. More information on using micro:bit classroom here.
Coding Introduction
- Ask the learners, “What is coding? Why do we code?” (Give learners an opportunity to activate their prior knowledge and share their experiences with coding)
- Once they have shared their ideas, offer a simple definition of coding. Eg: “Coding is a language that we [humans] use with computers to get them to do what we ask them to.
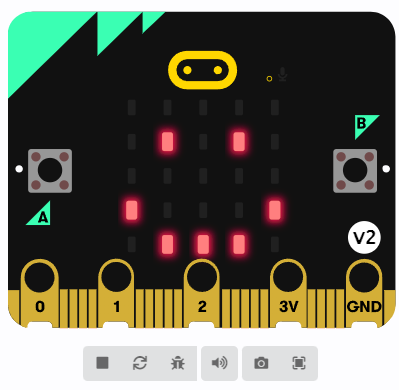
- Have learners pick up their micro:bit and make observations about what they think it can do. In particular, have students locate the following:
- Button A and Button B
- The display LED lights on the front
- The reset button on the back
- The speaker on the back
- The micro:USB plug
- The plug for the battery pack
- Introduce the activity: “Today we are going to code our micro:bits to act like a virtual pet that requires attention to stay happy! We will code our pet in three different phases today: first, we will code our pet to wake up, then we will code our pet to respond to being ignored, then we will code some interactions to keep our pet happy!”
Phase one: Waking the pet up
- Show students the starting code that we will build from in the activity today:
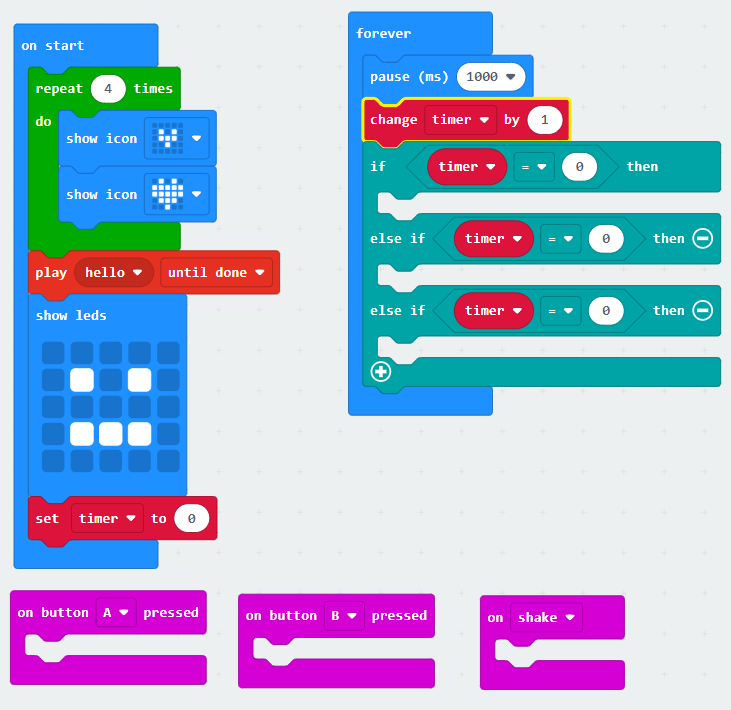
*Note: the ON START section will be phase one, FOREVER section will be phase two, and the three pink inputs (BUTTON A, BUTTON B, SHAKE) will be phase three.
- Have learners read through the code in ON START and get them to explain what is happening. Notice that:
- There is a loop (repeat) with two different icons inside – this creates a little animation similar to how you draw different frames of movement and flip between them to animate pictures
- There is a sound
- There is a starting face (you can use that block to make your own designs or use icons of pre-made ones
- Right away we create a timer that our pet will use to keep track of how long it has been ignored
- Give students time to customize the wake up phase of their pet. They can change the animation, sound, and face or add additional blocks from BASIC and MUSIC as they desire.
- Remind them not to touch/change any of the other code or to remove the set timer to 0 block in ON START.
- Download the code and test it out!
Phase two: Coding the pet’s moods when ignored
- Review the code currently sitting in FOREVER and ask students how long 1000 ms is? Particularly note that the code is doing the following:
- Waiting for one second before increasing the timer by 1. Then it will check how many seconds have passed of being ignored.
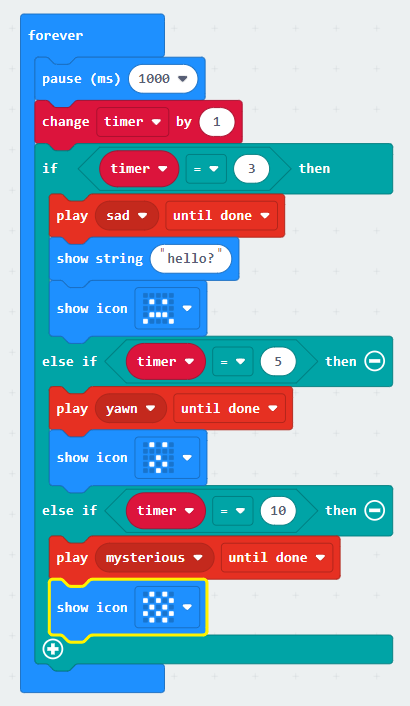
- Right now all three timer checks are 0 seconds. Have students select three different amounts of times to check. We recommend 3, 5, and 10 seconds.
- Each gap after a check needs to be filled with the pet’s response to being ignored for that amount of time.
- Will it make a sad face? An animation? A different sound? Will it display words? All of those?
- Maybe it starts out sad after 3 seconds, then gets tired after 5 seconds, then falls asleep after 10 seconds.
- Give students time to choose the times and code the responses to being ignored for that long. They will use blocks from BASIC and MUSIC.
- Download the code and test it out!
Example code:
Phase three: Coding the interactions
- The last thing we need to do is code some interactions to keep the pet happy! Notice there are three different inputs that we can use to interact with our pet: button A, button B, shake.
- There is one block of code that all of these inputs will need: set timer to 0! (found in VARIABLES) Ask learners why this is needed (because we’re interacting with the pet, it doesn’t need to keep counting how long it’s been ignored, we can reset that count so it doesn’t get sad!)
- Give learners a minute to brainstorm what three interactions they will code for their pet and how to best represent them with the code available.
- Examples: feeding the pet, playing with the pet, taking the pet for a walk, etc.
- Give learners time to fill each input with a set timer to 0 and a representation of their interaction using blocks from BASIC and MUSIC
- They can code messages to display, icons, animations, sounds, etc.
- Download and test it out!