All Resources

Brain Sprouts

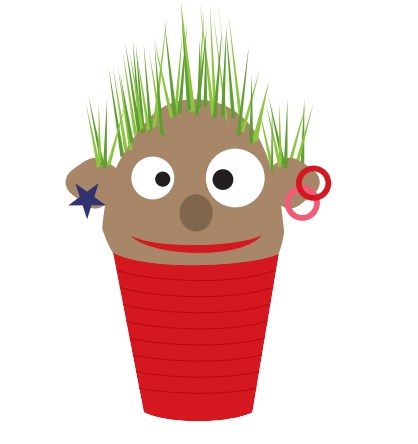
In this activity, students learn about what plants need to grow by growing silly-looking, edible heads. 

Learning how plants grow is more fun when you try growing them yourself.

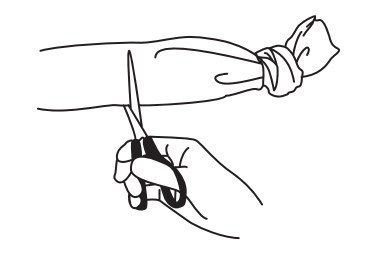
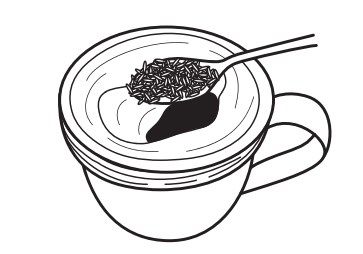
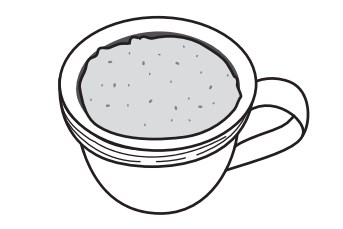
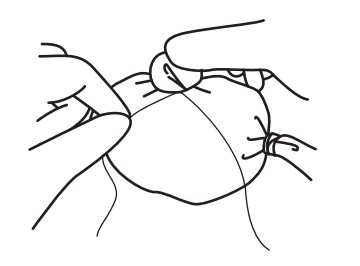
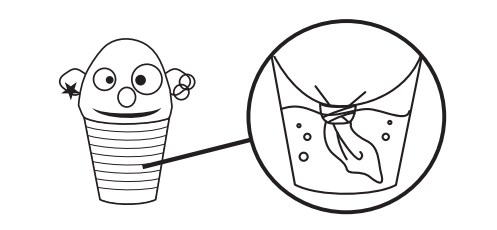
Plants need clean air, a source of water, and a source of sunlight to grow and thrive. You can transform seeds into sprouts quickly and creatively in this fun and functional activity.

If tended correctly, these edible heads will sprout “hair” within a week and last up to several weeks. Delve deeper into your understanding of how plants grow by growing the edible heads in different conditions. 

Objectives

  • Explain the needs of plants and identify how plants grow.

Materials

  • Per Student or Group:
    thin nylon stockings (the bigger mesh the better)
    peat moss or potting soil
    wheatgrass, alfalfa, chia, arugula, clover or other small sprouting seeds
    cups or mugs
    decorations: permanent paint, glue, buttons, plastic eyes, beads, yarn, etc

Key Questions

  • Why do the seeds go into the stocking first?
  • What would happen if you put the seeds in the middle?
  • Why do we soak the heads completely first?
  • Why do we put the heads in a sunny window and give them water?
  • What other materials could we use?

What To Do

Activity

  1. Cut-off an 8 inch (20 cm) section of stocking that includes the toe. (You can use a “tube section” that doesn’t include the toe. tie a knot in one end to close it, then turn it inside out to hide the knot.)
  2. Stretch the stockig over a large cup or mug, and spoon in about 2 teaspoons full of seeds. This is where the top of the head will be and where the “hair” will sprout from.
  3. Pack in some potting soil or peat moss. Aim for the head to be roughly the size of a tennis ball.
  4. Tie a knot to close the end. There is no need to cut off the dangly bit. Turn the ball upside down, with the not on the bottom, and you have the basic head.
  5. Make a nose an ears by grabbing a bit of stocking, twisting it, and fastening the base with some thread, wool or a small rubber band.
  6. Create a face with plastic eyes, paints, beads, or toothpicks.
  7. Once all the paint and glue is dry, water your edible head. Put it in a tray of water so that the peat moss or soil gets completely soaked. Then prop it up in a cup to drain.
  8. Water your head by filling the cup with enough water to allow the dangling piece of stocking to touch the water. Capillary action will keep your sprouts moist.
  9. Keep the head in a sunny location, and continue to water it from the top every few days or when it gets dry. Depending on which type of seed you use, you’ll have grown a full head of hair between several days to two weeks.
  10. Style any way you like.

Experiment

  1. With a partner or group, create several heads. Try growing each in a different growing condition. You can try:
  • Light vs. dark
  • Various types of seeds
  • Various amounts of water
  • Various types of soil
  • Adding organic fertilizers
  1. Record the speed/height of growth in each condition over a period of time and come to a conclusion about the best conditions for the seeds to sprout.

Extensions

  • Take a picture each day to record growth.
  • Trim your sprouts into a flat-top style. Measure to see how quickly the sprouts grow back.
  • Use an empty egg carton to plant and label a variety of seeds. Compare how quickly the different sprouts grow.

About the sticker

Survivors

Artist: Jeff Kulak

Jeff is a senior graphic designer at Science World. His illustration work has been published in the Walrus, The National Post, Reader’s Digest and Chickadee Magazine. He loves to make music, ride bikes, and spend time in the forest.

About the sticker

Egg BB

Artist: Jeff Kulak

Jeff is a senior graphic designer at Science World. His illustration work has been published in the Walrus, The National Post, Reader’s Digest and Chickadee Magazine. He loves to make music, ride bikes, and spend time in the forest.

About the sticker

Comet Crisp

Artist: Jeff Kulak

Jeff is a senior graphic designer at Science World. His illustration work has been published in the Walrus, The National Post, Reader’s Digest and Chickadee Magazine. He loves to make music, ride bikes, and spend time in the forest.

About the sticker

T-Rex and Baby

Artist: Michelle Yong

Michelle is a designer with a focus on creating joyful digital experiences! She enjoys exploring the potential forms that an idea can express itself in and helping then take shape.

About the sticker

Buddy the T-Rex

Artist: Michelle Yong

Michelle is a designer with a focus on creating joyful digital experiences! She enjoys exploring the potential forms that an idea can express itself in and helping then take shape.

About the sticker

Geodessy

Artist: Michelle Yong

Michelle is a designer with a focus on creating joyful digital experiences! She enjoys exploring the potential forms that an idea can express itself in and helping then take shape.

About the sticker

Science Buddies

Artist: Ty Dale

From Canada, Ty was born in Vancouver, British Columbia in 1993. From his chaotic workspace he draws in several different illustrative styles with thick outlines, bold colours and quirky-child like drawings. Ty distils the world around him into its basic geometry, prompting us to look at the mundane in a different way.

About the sticker

Western Dinosaur

Artist: Ty Dale

From Canada, Ty was born in Vancouver, British Columbia in 1993. From his chaotic workspace he draws in several different illustrative styles with thick outlines, bold colours and quirky-child like drawings. Ty distils the world around him into its basic geometry, prompting us to look at the mundane in a different way.

About the sticker

Time-Travel T-Rex

Artist: Ty Dale

From Canada, Ty was born in Vancouver, British Columbia in 1993. From his chaotic workspace he draws in several different illustrative styles with thick outlines, bold colours and quirky-child like drawings. Ty distils the world around him into its basic geometry, prompting us to look at the mundane in a different way.